


Creating an Azure Function from the Command Line
There are several ways you can create an Azure Function. You can use Visual Studio, Visual Studio Code, or even the Command Line. For purposes of this article, we’re going to use the command line. We’re also going to use C# for this article, though you can follow essentially the same steps for TypeScript or JavaScript. You can also use Java, PowerShell, or Python for your Azure function. The prerequisites, command-line parameters, and code samples will be different for other languages.
Prerequisites
We need to make sure our environment is setup properly. The assumption for this article is that you are going
-
Azure CLI - You can check to see if you have the CLI by running
az --versionat the command line. Microsoft documentation states that you need to have version 2.4 or later. If you need to install the CLI, you can do so by visiting https://docs.microsoft.com/en-us/cli/azure/install-azure-cli. -
Azure Account - If you don’t have an active Azure account and subscription, you can sign-up for a free account by visiting https://azure.microsoft.com/free/. To ensure that your account is active, you can use the Azure CLI that you just installed and run the following command line:
az login. -
Azure Functions Core Tools - You can check to see if you have the core tools by running
func --versionat the command line. Microsoft documentation states that you need to have version 2.7.1846 or later. If you need to install the core tools, you can do so by visiting https://docs.microsoft.com/en-us/azure/azure-functions/functions-run-local#v2. -
[Optional] Git Repository - I always like to start by creating an empty folder and initializing it with git. I’ve talked about this in previous posts. You can do this by starting on Github or BitBucket, but you can also create a new folder locally and run
git initon it.
Creating Our Function
Now that we’ve validated the prerequisites, it’s time for us to move forward to create our local function. Within a new, empty folder, I’m going to create a new function project called api. In my case, I have repositories stored at c:\repos. So, I’m navigating to that directory and then executing the following:
1
func init api --dotnet
If I then navigate into c:\repos\api, I’ll find a .vscode folder, a .gitignore file, an api.csproj file, a host.json file, and a local.settings.json file. Since sensitive data such as passwords and other secrets can be stored in local.settings.json, you’ll notice that this file is excluded from source control in the .gitignore file.
Next, we’ll create a new function called name-get. We’ll setup this function as an HTTP Trigger by passing in that template. Other templates that can be used can be found at https://github.com/Azure/azure-functions-templates/.
1
func new --name name-get --template "HTTP trigger"
A new file, name_get.cs will now be generated.
Executing Our Function
You can run your function locally from within the c:\repos\api by executing the following command:
1
func start
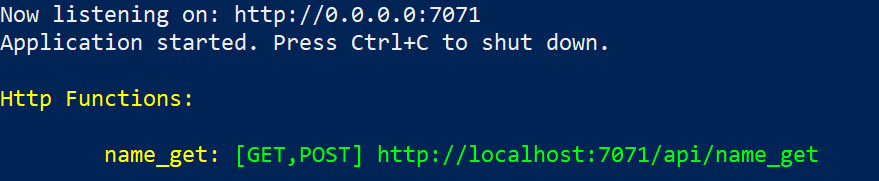
After libraries are restored and your project builds, you’ll receive a URL similar to http://localhost:7071/api/name_get.
If you execute that URL and pass a name in the query string like so:
1
http://localhost:7071/api/name_get?name=Jason
You’ll see a response like:
1
Hello, Jason. This HTTP triggered function executed successfully.
You’ve now successfully executed a function from the command line. This function can now be deployed to Azure, or you can build upon it.
In a future post, I’ll update this function and deploy it to Azure.