


Adding Azure Feature Flags to Client Side Applications like Angular
Previously, I posted about adding Azure App Configuration and Feature Flags using Azure to an ASP.NET Core MVC application. In this post, we’ll follow the same basic process, but we’ll setup our Angular application to support the Azure Feature Flags. At this point, I’m assuming that you are familiar with the following items:
- Setting up Your Angular Environment
- Using VSCode to Build and Run an Angular Application
- Adding Azure Feature Flags to Your ASP.NET Razor Pages Application
If you are familiar with this, then you know how to setup an angular environment from the command line, create a minimal Angular application by executing ng new MyApp --minimal, and add the Azure App Configuration resource in Azure. If you haven’t performed the first part of this, you can feel free to get started in GitHub by generating a clone of the base project clicking the button below. You must have your Azure App Configuration resource configured before proceeding.
Getting Started
Now that we have a basic Angular application and our Azure App Configuration resource configured, we’ll start by installing the @azure/app-configuration package into our project. You can do this by modifying the package.json file or by running npm install @azure/app-configuration from a command line. While we can connect to our Azure App Configuration resource by using the @azure/identity package as described here, we already have our connection string from the setup we performed earlier. So, we’ll use the connection string. However, we still need to bring in the @azure/identity package into our project. We’ll do this by modifying the package.json file or by running npm install @azure/identity from a command line.
As of July 7th, 2020, version 1.1 of the @azure/app-configuration package has been posted. If you are attempting to use a previous version, you may experience an issue that I've documented here.
Updating the App.Component.ts File
Now that we have the proper packages loaded into our application, we’ll update our application. Open the app.component.ts file found in the src\app folder. The first thing we’ll do is add a new import at the top of the page:
1
import { AppConfigurationClient } from "@azure/app-configuration";
This will bring in the app configuration client package into this component. Next, we’ll modify the template we’re using to add a single line letting us know that the “About Me” feature is enabled or disabled. To do this, we’ll create a binding and since the getConfigurationSetting() method is async, we’ll need to add the async value to our binding. In my case, I added the 4th line right below the title of the page:
1
2
3
4
5
<h1>
  Welcome to !
</h1>
<p>Here is the value: </p>
<span style="display: block"> app is running!</span>
Finally, we’ll need to update the class AppComponent by adding in a new property called called aboutMeFeature and we’ll add an internal async function called ShowAboutMe(). Our complete class code looks like the following:
1
2
3
4
5
6
7
8
9
10
11
12
13
export class AppComponent {
  title = 'AngularAzureFeatureFlag';
  aboutMeFeature = this.ShowAboutMe();

  async ShowAboutMe() {
    const conn = 'AZ_CONFIG_CONNECTION';
    const client = new AppConfigurationClient(conn);

    var val = await client.getConfigurationSetting({ key: ".appconfig.featureflag/ShowAboutMe" });

    return JSON.parse(val.value).enabled;
  }
}
We’ll replace the connection string with the READ ONLY connection string value as mentioned above.
Remember to ensure you are using a **READ ONLY** connection string as the string will be exposed to end users in the browser. Failure to use the proper connection string may open your application for external attacks.
Also note that instead of using just the ShowAboutMe portion of the key name, we must use .appconfig.featureflag as the prefix as the AppConfigurationClient obtains the value from Configuration explorer and not Feature manager in the Azure App Configuration resource.
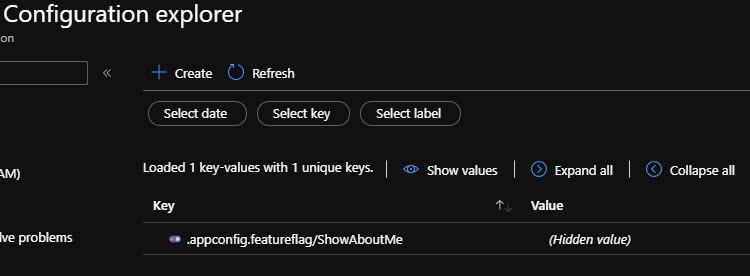
If you click the ellipsis in the same row as your feature and choose Data viewer, you’ll see the value that would be returned to the browser. In my case, this would be returned:
1
2
3
4
5
6
7
8
{
	"id": "ShowAboutMe",
	"description": "",
	"enabled": true,
	"conditions": {
		"client_filters": []
	}
}
Looking back up at the class, you’ll notice I’m using JavaScript’s JSON.parse() to parse the value and obtain the value of the enabled property.
If we are attempting to obtain all of our features, we can do so by using the listConfigurationSettings() method on our client. We can then iterate through the config settings to obtain all of the enabled statuses.
Executing our Application
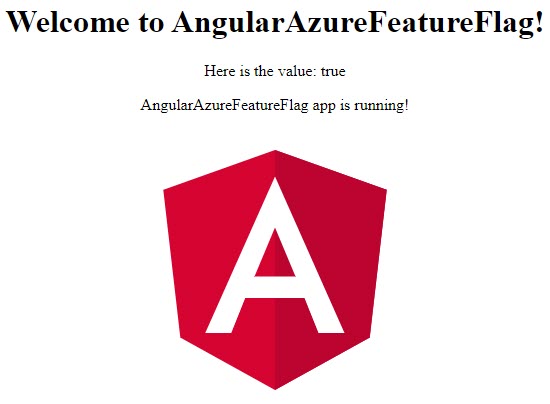
Now that we’ve made those subtle changes, we’ll build our application and then serve our application by running ng build and ng serve in succession. When browsing the returned URL, we’ll notice the phrase “Here is the value: true” right below the title banner:
Summary
During this tutorial, we walked through setting up our application to connect to the Azure App Configuration resource. We then updated our minimal Angular application to make the connection and to check for a specific value of one of our features. Finally, we executed to make sure that the feature was displaying the value we anticipated.
This is a very basic sample, but it’s not that difficult to build upon by adding more features. Also, while we choose Angular for this demo, any client-side framework can integrate just fine.
If you’re interested in seeing the finished product, be sure to grab the completed source from the following GitHub branch:
If you are interested in server side use of the Azure App Configuration resource and Feature Flags, be sure to check out my post at jasong.us/2AL2pdP.