


Creating an Amazon Alexa Skill using .NET Core and Microsoft Azure
You’ve had an Amazon Echo for years and have become accustomed to saying “Alexa, what’s my daily briefing” or “Alexa, what’s the weather for this weekend.” But, chances are if you are reading this post, you are a developer that would like to do more with Amazon Alexa. Maybe you’re not a Node.js or Python developer but a .NET developer. Maybe you have never used Amazon AWS but rather use Microsoft Azure. Well, this post will walk through creating an Alexa skill to check with GitHub to find out if we have any pending pull requests. Sure, this is a simple ask, but we’ll host this skill in Azure and wire up to the Alexa console.
Before we begin, you’ll need to have the following:
- An Azure account
- A GitHub personal access token that can read pull requests within a project (recommend checking just the
reposcope for the token) - An Amazon developer account
Creating Skills Using Alexa Developer Console
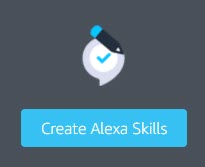
After you have created your Amazon developer account, head back to the Amazon developer console by clicking on create skills in the Amazon Alexa developer account screen.
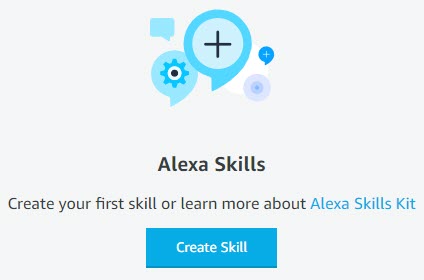
Next, click the Console button in the menu of the Create Alexa Skills screen.

Then, click the Create Skill button in the center of the skills list or in the top, right-hand of the screen. You may not have this button in the center of the skills list, as depicted below, if you currently have skills created and configured.
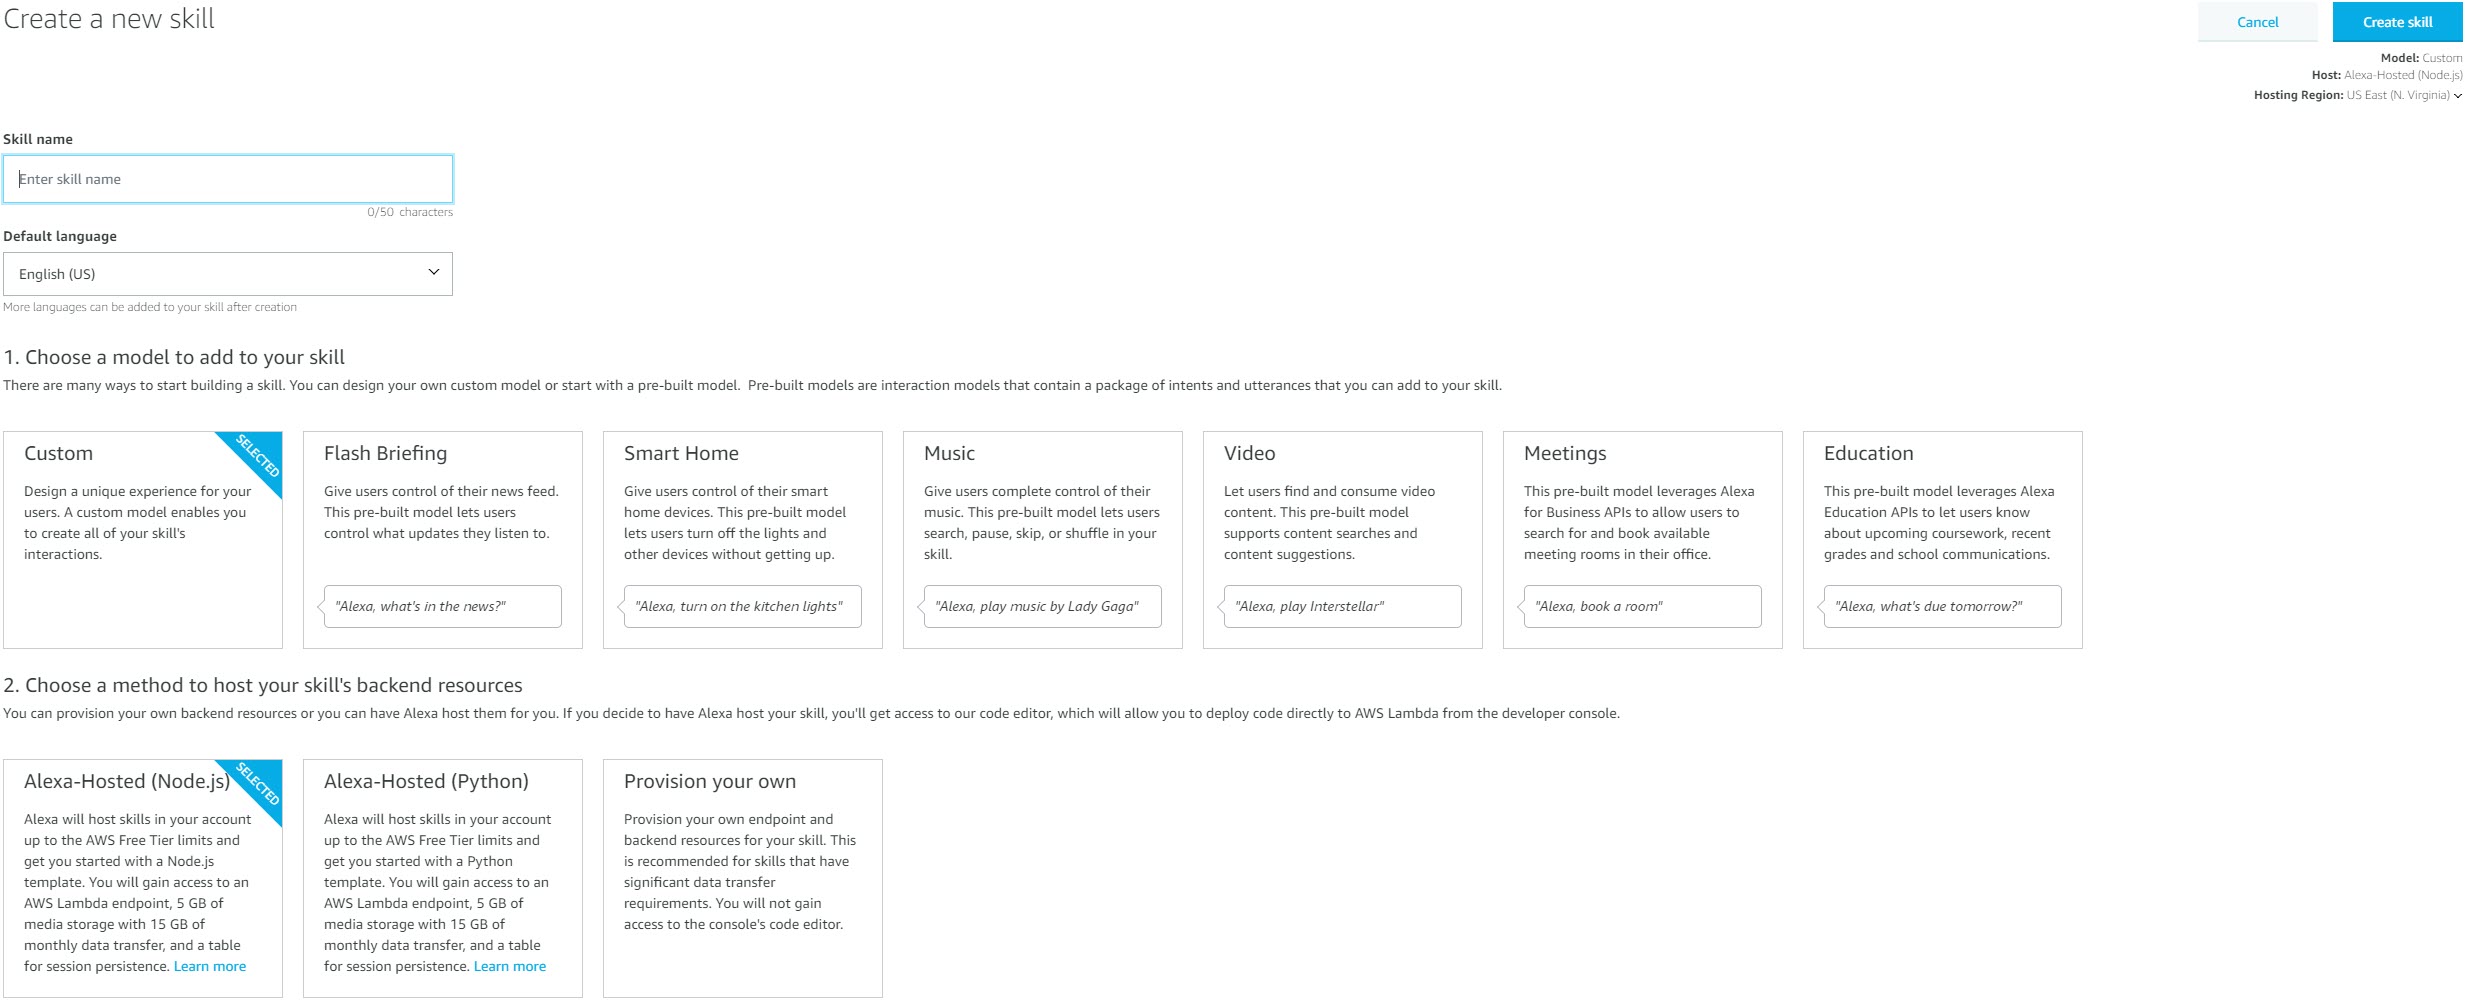
You’ll now be placed into the Create Skill wizard for Amazon Alexa. The first step in the wizard will prompt you for a skill name, default skill language, skill model, and a method of hosting. There are several pre-built models for an Amazon skill including Flash briefing, Smart Home, Music, Video, Meetings, and Education. For purposes of this tutorial, we’ll choose the Custom model option. There are also three different methods for hosting our Alexa skill. We can use a Node.js lambda in AWS, Python lambda in AWS, or provision our own. If we choose either of the AWS options, the hosting region can be modified using the drop-down in the upper, right-hand corner of the screen. Since we want to create our skill using .NET, we’ll choose to Provision your own.
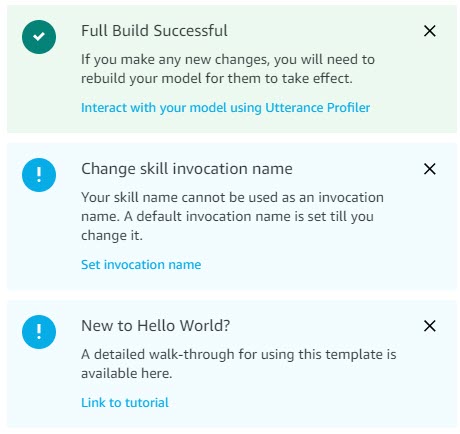
Upon continuing, you’ll be prompted to Choose a template to add to your skill. You can choose from Hello World Skill, Fact Skill, Quiz Game Skill, High-Low Game Skill, or Sauce Boss Skill. Again, we’ll leave the default Hello World Skill as this will help us get started.

The Amazon console will now take a few seconds to generate your template and add it to the skill. After this process is completed, you’ll be taken to the Alexa Developer Console screen for your skill. In addition, a full build for your skill will start. A minute or less later, you’ll notice a new toast notification to the lower, right-hand corner of the console screen. This will inform you that the skill has been successfully built. It does not have any functionality and will need to be modified further, but we’ve completed the skill creation process.
Understanding Invocation, Intents, Utterances, and Slots
Alexa skills use terms that you may not be familiar with. To better explain each, please see their definition below along with the appropriate example of each:
- Invocation - This is a phrase that kicks off the skill such as “Alexa, ask GitHub if I have any pull requests”. Since we’re using a custom skill, this is needed.
- Intents - An intent is what the user, who is interacting with your skill, is intending to accomplish. This allows your skill to have different “paths” to follow. For our case, we’ll use a single intent we’ll name GitHubPullRequest.
- Utterances - These are phrases that users will use when making the request to your skill such as “how many pull requests do I have?” or “do I have any PRs?”. As time passes, you may need to add more utterances to direct your user accordingly.
- Slots - Slots are variables that specifically direct the skill down a certain path and usually help to direct which data set to use. When using built-in skills, there are predefined slots you can use. However, as a developer, you may choose to have a slot for GitHub and one for Azure DevOps as the implementation may be two separate functions and data sets.
These are typically combined in a manner where if you ask “Alexa, open DevOps”, Alexa knows that DevOps is the Invocation. If this is followed with “PullRequest count for GitHub”, PullRequest is the intent, count for is the utterance, and GitHub is the slot.
You may need to reference this glossary of terms as you proceed with this post.
Creating the ASP.NET Core API
To get started on the .NET API, we’ll kick things off by creating a brand new .NET Core API. We’ll do this by creating a project from the command line like so:
1
dotnet new webapi -n AlexaGitHubDemo
This will create an ASP.NET Core Web API project with a default controller called the WeatherForecastController. However, before we continue with modifying the app, let’s load the Alexa.NET Nuget package. We can install this package by executing the following:
1
dotnet add package Alexa.NET
Also, because we want to integrate with GitHub, we’re going to leverage a package available by the GitHub team called Octokit. I posted recently about using this package and a companion package called Octokit.Reactive. We can install the Octokit package by executing the following:
1
dotnet add package Octokit
I like to use Visual Studio Code for everything as opposed to Visual Studio, so we’ll use VS Code as our editor. Let’s come back to the project and we’ll remove the Controllers\WeatherForecastController.cs file from the application. We’ll create a new controller in the Controllers folder called AlexaController. I’m
1
2
3
4
5
6
7
8
9
10
11
12
13
14
15
16
17
18
19
20
21
22
23
24
25
26
27
28
29
30
31
32
33
34
35
36
37
38
39
40
41
42
43
44
45
46
47
48
49
50
51
52
53
54
55
56
57
58
59
60
61
62
63
64
65
66
67
using Alexa.NET;
using Alexa.NET.Request;
using Alexa.NET.Request.Type;
using Alexa.NET.Response;
using Microsoft.AspNetCore.Mvc;
using System.Linq;
using Octokit;
using Octokit.Internal;

namespace AlexaGitHubDemo.Controllers
{
    [Route("api/[controller]")]
    public class AlexaController : Controller
    {
        public const string owner = "jasongaylord";
        public const string repo = "JasonGaylord.com";
        public const string product_name = "AlexaGitHubDemo";
        public const string token = "<INSERT_PERSONAL_ACCESS_TOKEN_HERE>";

        /// <summary>
        /// This is the entry point for the Alexa skill
        /// </summary>
        /// <param name="input"></param>
        /// <returns></returns>
        [HttpPost]
        public SkillResponse HandleResponse([FromBody]SkillRequest input)
        {
            var requestType = input.GetRequestType();

            // return a welcome message
            if(requestType == typeof(LaunchRequest))
            {
                return ResponseBuilder.Ask("Welcome to the GitHub pull request count skill.", null);
            }

            // return information from an intent
            else if (requestType == typeof(IntentRequest))
            {
                // do some intent-based stuff
                var intentRequest = input.Request as IntentRequest;

                // check the name to determine what you should do
                if (intentRequest.Intent.Name.Equals("GitHubPullRequest"))
                {
                    // get the pull requests
                    var pullrequests = CountPullRequests();

                    if (pullrequests == 0)
                        return ResponseBuilder.Tell("You have no pull requests at this time.");

                    return ResponseBuilder.Tell("There are " + pullrequests.ToString() + " pull requests waiting for you at GitHub.com.");
                }
            }

            return ResponseBuilder.Ask("I don't understand. Can you please try again?", null);
        }

        [HttpGet]
        public int CountPullRequests()
        {
            var creds = new InMemoryCredentialStore(new Credentials(token));
            var client = new GitHubClient(new ProductHeaderValue(product_name), creds);
            var pullrequests = client.PullRequest.GetAllForRepository(owner, repo).Result;
            return pullrequests.Count();
        }
    }
}
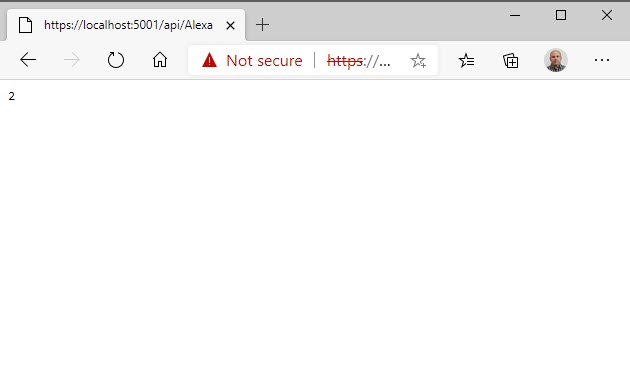
I like to keep the CountPullRequests() function around so I can ensure that my service is working outside of Alexa. Hitting the endpoint by running dotnet build and subsequently dotnet run, I’ll see that my service should work:
You’ll notice in the code above that our Alexa skill will return a type of SkillResponse and that we’ll evaluate how to handle the response based on the SkillRequest. If the type of the request is an IntentRequest, we’ll check which intent is being requested and process accordingly. For now, we only have the GitHubPullRequest intent but you can see we can easy expand this service to include other GitHub values, such as issues, or even other services, such as Azure DevOps.
Note: .NET Core 3.1 has known issues with deserialization. It is recommended that you update your services to include Newtonsoft.Json. You can find out more about this by visiting my previous post at https://jasong.us/2ZBGyiY.
Publishing the .NET Core API
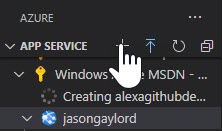
Since we are using VS Code to modify our project, we’ll also use VS Code to add our app service. For this, we’ll use the Azure Tools extension. We’ll click the Azure Tools icon and under app services, choose to Create a new Web App….
Next, we’ll hit the icon to deploy to the new app service we’ve created. Choose the appropriate app service in VS Code. You may get an error that the Required configuration to deploy is missing from ‘YOUR APP NAME’.
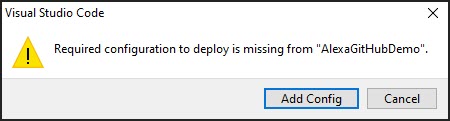
If you receive that error, click the Add Config button and restart the upload process. You’ll receive another message that anything within that application will be overwritten. Since we just created that app, we don’t care as nothing is in the app. So, click the Deploy button.
Note: At the time of this post, .NET Core 5.0 is not a valid target framework for Azure. Be sure you are deploying your app as a .NET Core 3.1 application or deploying your app as a self-contained app. For more information about this, read my previous post at https://jasong.us/2Zy9sRi
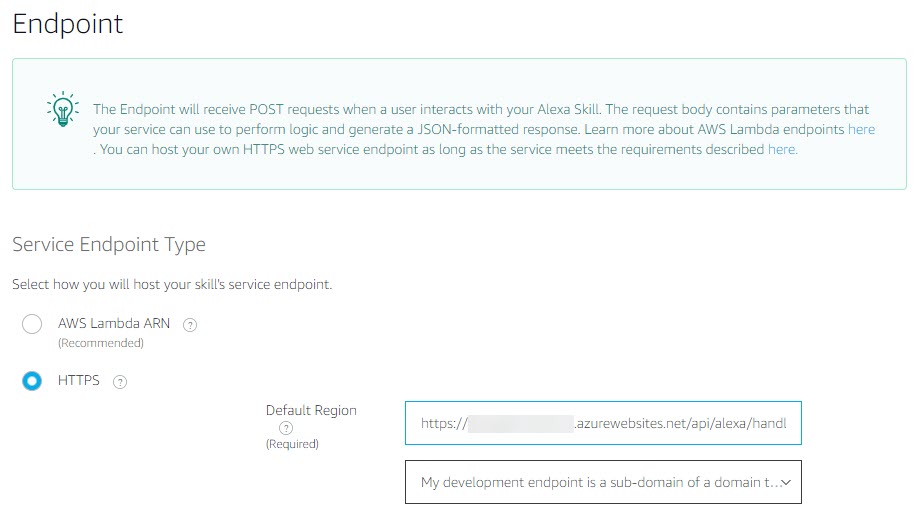
Register Endpoint with Alexa Skill
The next thing we’ll need to do is update our Alexa endpoint. Hop back into the Alexa Developer Console and navigate to Custom > Endpoint. We’ll enter our endpoint, replacing the <tokens> appropriately with https://<app_service_name>.azurewebsites.net/api/<controller>/<method_name> and selecting My development endpoint is a sub-domain of a domain that has a wildcard certificate from a certificate authority. This is because we’re using the Azure websites URL as opposed to a custom URL.
We can now save, build, and test our skill.
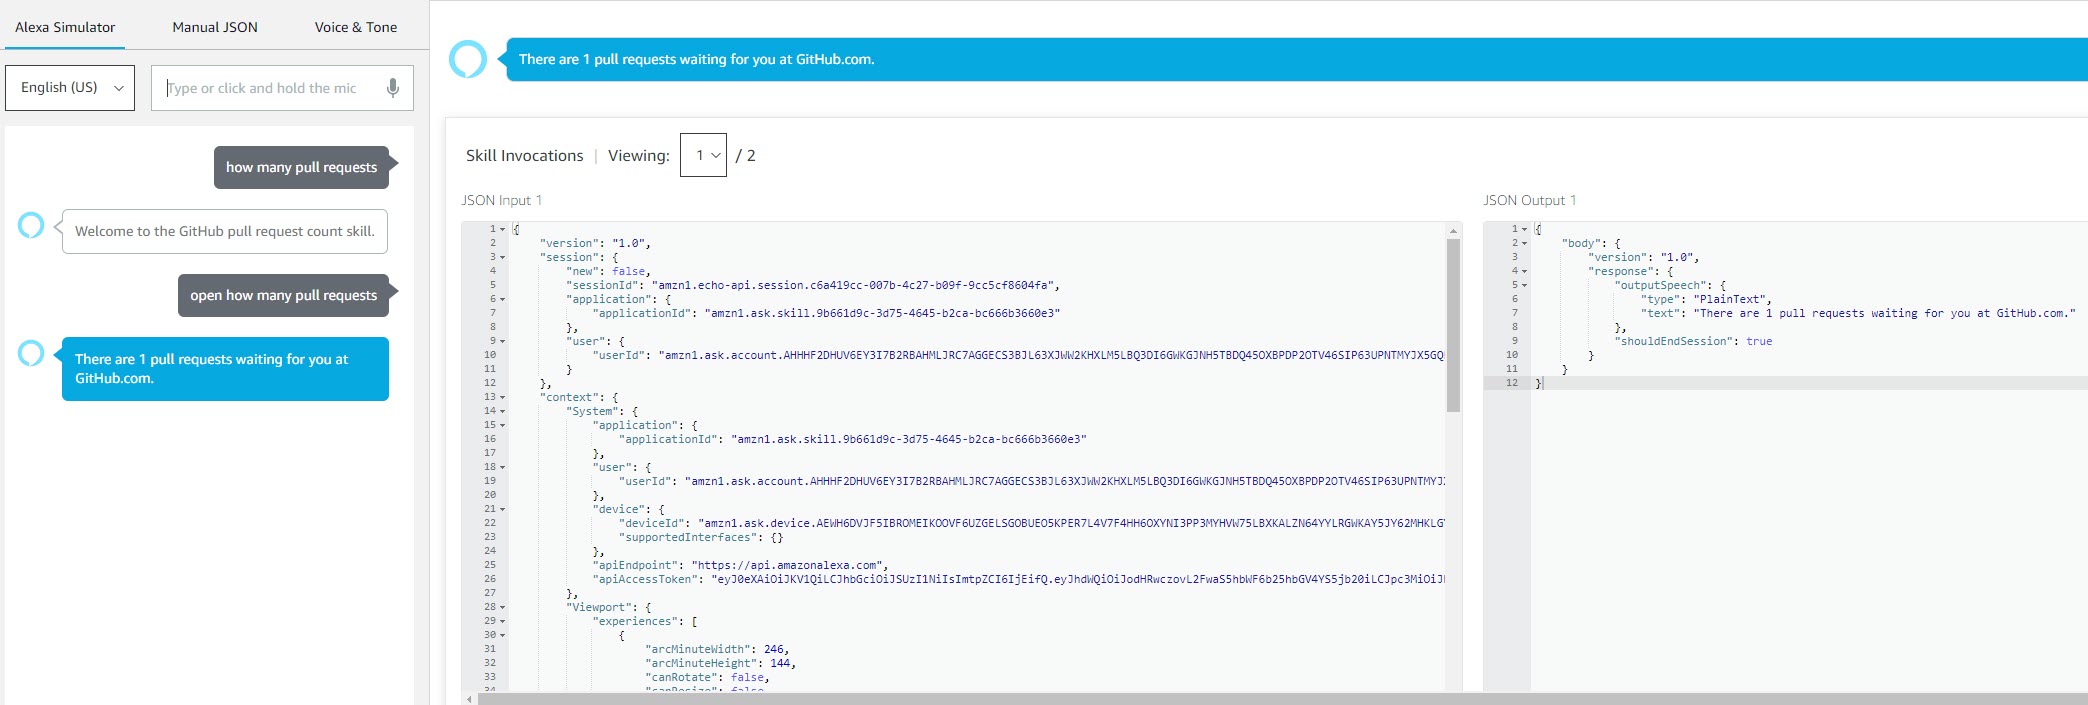
Testing Your Alexa Skill
You can now click on the Test menu option in the Alexa Developer Console. Be sure that you have built your Alexa skill first. If everything works correct, you should have a successful interaction with the Alexa Simulator:
Tip: If you run into 500 issues with your service, I recommend using Postman to connect and debug your service. You can use the JSON in the Amazon Alexa Developer Console as the body of the request being sent to your application.
Summary
We started creating an Alexa skill. We then created a .NET Core Web API to handle the skill and utilize the Alexa.net and Octokit packages. We published our .NET Core Web API and finally tested our API with our Alexa skill. If you’re interested in the code I used for this project, you can grab it from: