


Getting Started with Snowflake
Snowflake is a “data warehouse as a service” platform that has been around publicly since October 2014. Just last month the company went public with its IPO on NYSE and was the highest valued software IPO ever. The service allows organizations to query all of it’s data at once and assists with getting a data warehouse setup quickly. Think of it as being the new cool kid on the block within the big data space.
In this article we’ll:
Setup Your Snowflake Account
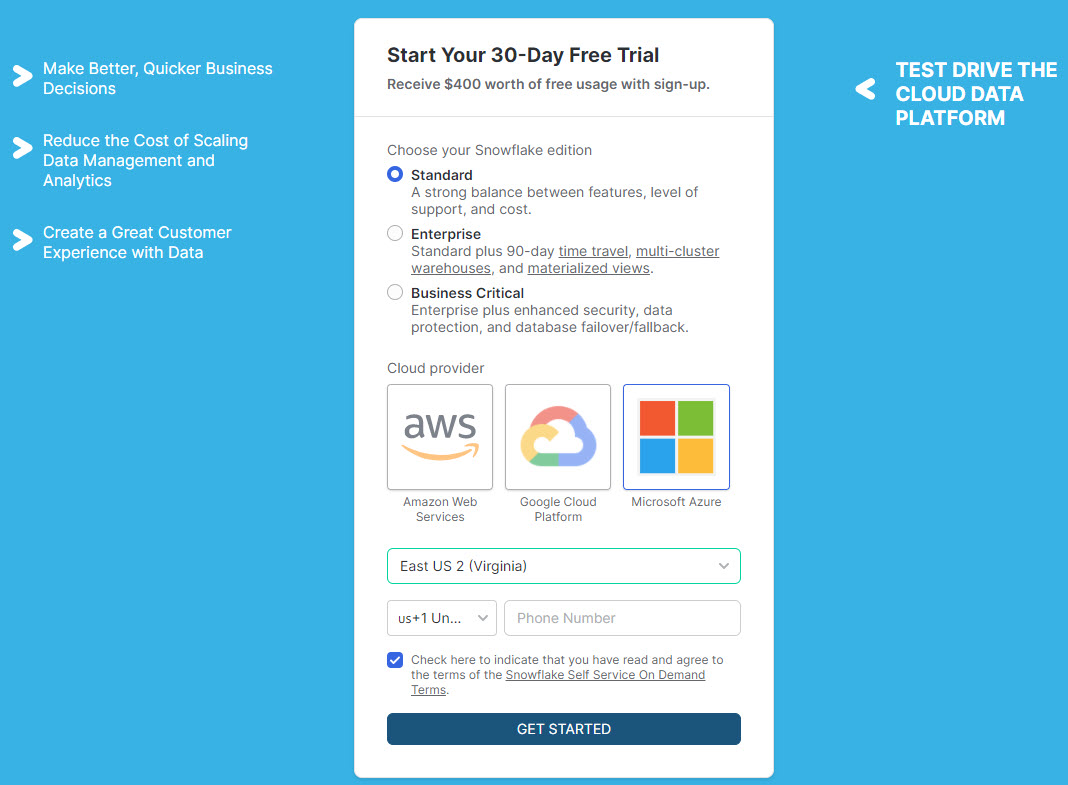
When setting up Snowflake, you’ll choose the edition of Snowflake you’d like to target as well as the cloud provider you’d like to host Snowflake with:
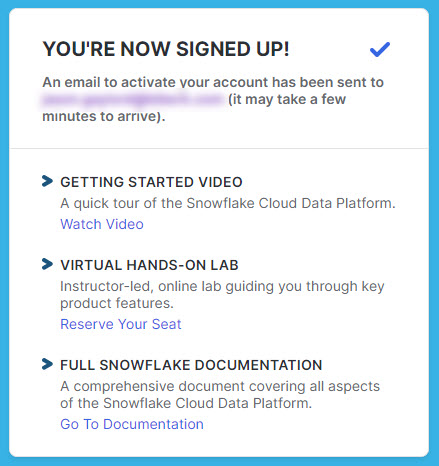
After continuing, you’ll have an opportunity to watch a quick video tutorial, participate in a hands-on lab, and also view the complete documentation.
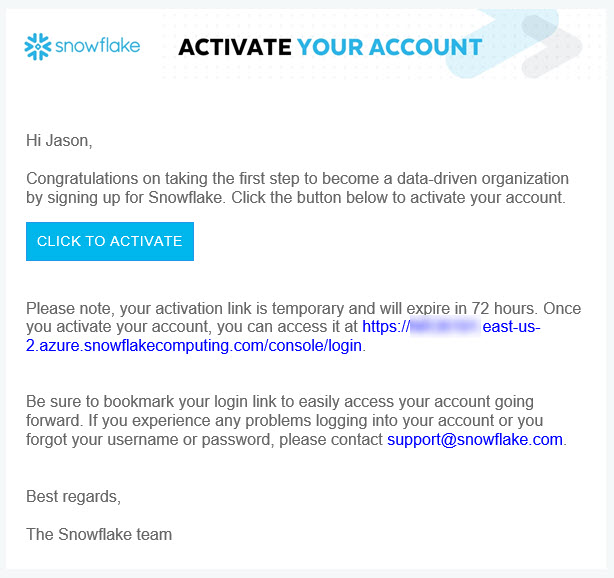
You’ll want to be sure to check your email as the activation link is only valid for 72 hours. In my case, I choose Azure to setup my account:
Now that you have your account activated, like most other services, you’ll create a username and password. Then, you’re in!
Query Snowflake Sample Data
Within the IDE, under the New Worksheet tab, navigate to the SNOWFLAKE_SAMPLE_DATA database object.
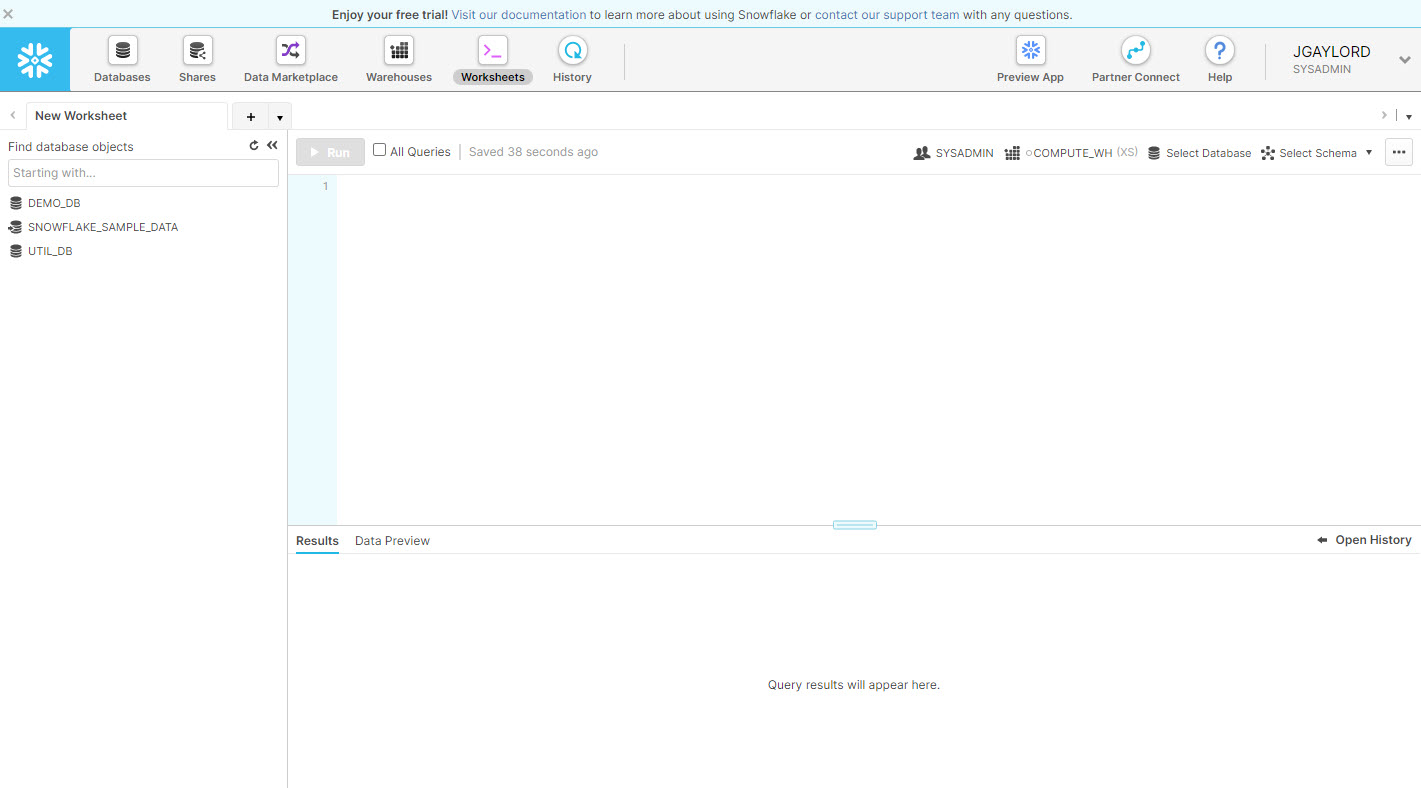
Next, navigate to the Weather schema and find the DAILY_16_TOTAL table. In this query, we’ll select 100 records of this data:

You’ll notice that the query syntax is most likely similar to what you’ve used in the past. You may also notice the total duration for the query. In my case, this was 9.11s in total; 2.22s for queuing, 3.38s for compilation, and 3.51s for execution. This did query 128.2 GB of data which equates to 331,443,064 rows.
Bring Your Own Data
This works great if you’d like to mess with the sample data. But, chances are you’d like to actually use your own. So, create a new database and have some fun. Be sure to check out the Snowflake tutorial for bulk loading using COPY. This will allow you to drop data exports from SQL or to use data currently stored in JSON. If using Azure, like me, you’ll connect to your Azure Storage account. You’ll also be able to bulk load data using a local file system, Amazon S3, or Google Cloud Storage. You can also continuously update your data using Snowpipe.