Automatically Push Versioned NuGet Packages using Azure DevOps Build Process
I’ve been using Azure DevOps (formerly called VSTS) hosted at visualstudio.com for a few years now. Over the past year I’ve been using their platform for continuous integration and continuous deployments. This is one of the more powerful features that the team continually is improving and making life easier for developers.
One of the more recent issues I faced is that we wanted to start hosting our own internal NuGet and NPM packages. Fortunately, Azure DevOps has an extension available from Microsoft called Package Management. Package Management is free for up to 5 users. Even if you don’t use the Microsoft Package Management solution, you can still use the proper steps in the build process. We’ll assume that you already have a feed setup prior to continuing.
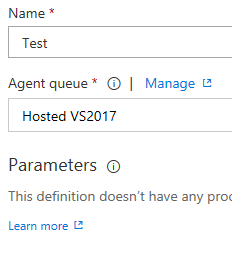
To setup the build process, choose to create a brand new Empty Process. You’ll need to specify the Name and Agent Queue like so:
Next, choose from where to obtain the source. This can come from Azure DevOps, GitHub, BitBucket, or another source:
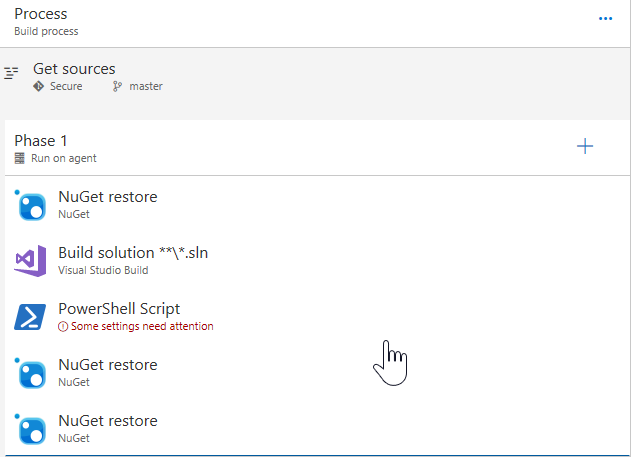
In Phase 1, Add the first task for restoring from NuGet. This is the NuGet task with the restore command selected. Next, add a Visual Studio Build task. Then add a PowerShell Script task and two more NuGet tasks. Your Phase 1 should resemble something like this:
The next step will be for us to define our PowerShell Script. I’ve changed the Type from File Path to Inline Script and added the following in the Inline Script field:
This will allow us to create an environment variable to be used in the version of our NuGet package. NuGet package version numbers use semantic versioning and requires that each of the values in the MAJOR.MINOR.PATCH format do not begin with 0. Using this value, we’ll be setting the format to be a 4 digit year (as the X value also know as the Major value), 1 or 2 digit month plus 2 digit day (as the Y value also known as the Minor value), and finally a 1 or 2 digit hour plus 2 digit minute and 2 digit second (as the Z value also known as the Patch value).
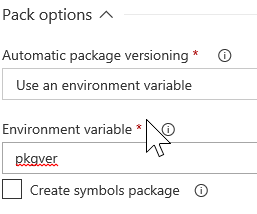
In the NuGet task below the PowerShell Script, we’ll change the command to pack. We’ll also expand the Pack options and choose to Use an environment variable specifying our new variable name, in which case we used pkgver.
Note: The reason we are taking the above approach as opposed to appending a value by using one of the other options you'll see in the Automatic package versioning dropdown above is that the the NuGet extension for Visual Studio currently views all –values for the NuGet package as prerelease. The concept in the Package Manager Azure DevOps extension for using @Release and @PreRelease tags are purely conceptual at this point and do not work with the NuGet extension for Visual Studio.
Finally, we’ll update the last NuGet task so that the command is push and we’ll update our Target Feed location to be This account/collection and choose our feed we already have created in the drop down. If you are using an external NuGet server, you’ll be able to choose that option adding your server and credentials through the manager. So, your first phase should be complete and look like so:
One final item that is optional would be to update the Triggers for your new Build and checking the box that asks to Enable continuous integration. You can also setup a nightly build schedule if you’d like to have a nightly NuGet package built.
Once everything builds successfully, hop over to Visual Studio and check out your package in the NuGet Package Manager.
 Jason N. Gaylord


