


Publishing Static Content to Azure Blob Storage
In a previous post titled Setting up a CDN using Azure Storage, I had explained how to use an Azure CDN resource on top of an Azure Storage account. However, there will be very few instances where you’d want to use the AzCopy command line utility or Microsoft Azure Storage Explorer application to push content every time a CDN change is needed. In fact, most folks would want to check in files and/or code using source control such as GitHub or Azure DevOps.
Step 1: Update Your Code Repository for Build Pipelines
The first step in publishing the static content is that we’ll want to prep our project to leverage the Azure DevOps Pipelines for building. In this particular case, we’re going to copy content in a 1:1 manner. However, in your particular case, you may want to use a YAML build file that more closely represents the content you are deploying such as NodeJS with Webpack or ASP.NET Core.
The YAML file above sets a trigger on the master branch so that whenever there’s a commit, such as a Pull Request being processed and merged into master, the Build pipeline will go through the continuous integration (build) process. The name of the build will be in the YYYYMMDD.Revision number pattern. The build will occur on an Ubuntu VM image in the shared agent pool. There are two tasks on this build. The first will copy files from the source directory over to the staging directory. The second will publish the build artifacts.
Step 2: Updating Your Storage Account in Azure
In a future post, I’ll explain how to add ARM templates to your CI/CD process to automatically create resources during deployment if those resources don’t exist. However, for this article, we’ll manually create and update the resources.
There are really three sub-steps:
- Create a container
- Set the Public Access Level on the container
- Update the CDN to point to the correct container
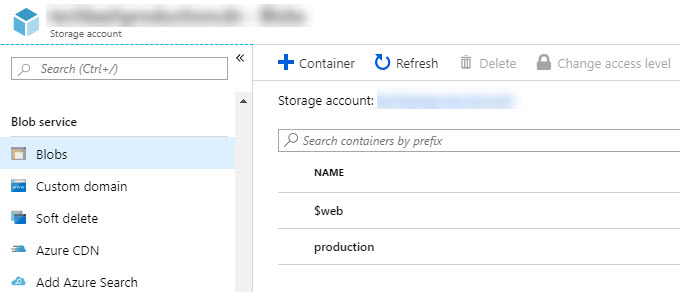
Go into your Storage Account and to the Blobs menu option in the Blob service menu. If you do not have a container yet, be sure to create one. For purposes of this, we’ll create a new container called staticcontent.
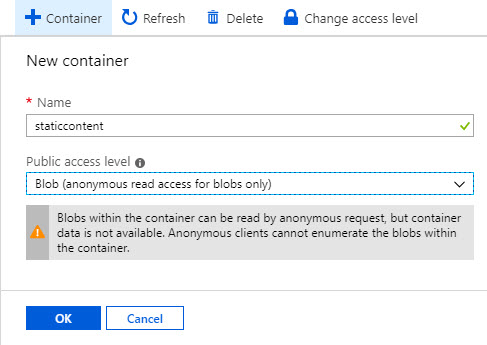
When we choose to add the Container, we’ll change the Public Access Level to Blob. This will allow us to access the blob storage files in this container publicly in the CDN. If you don’t make the change at the time of creation, you can check the box to the left of the container and change the Access Level after the fact.
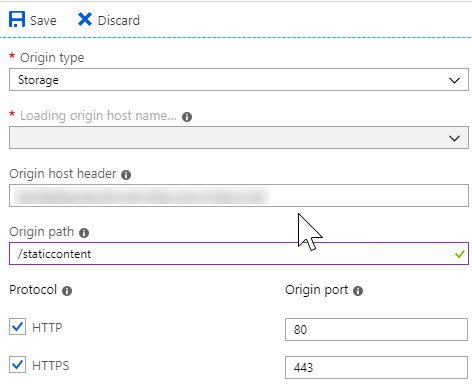
Navigate into the CDN endpoint. In the endpoint, update the origin to point to the new container.
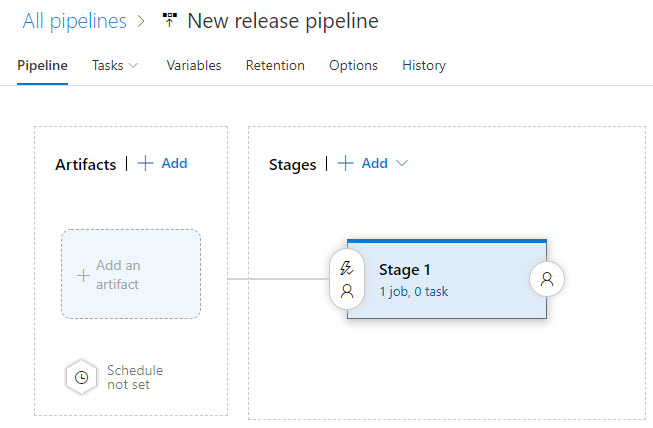
Step 3: Create the Release Pipeline
It’s recommended to start with an Empty release pipeline. Start off by exiting the Stage so you can add the artifact.
Then, enter the stage. Update the stage name to something meaningful. Since I have a habit of deploying content to a staging site first, I have a stage called Staging Content and another called Production Content. However, you can name the stage whatever. Add a task to the Agent job. The task should be the Azure File Copy task.

For the Source, enter the value of the drop folder. For instance, my value may look like: $(System.DefaultWorkingDirectory)/CDN/drop/ if my artifact name is called CDN. Authenticate to Azure and choose the subcription, Azure Blob for the destination type, choose the storage account, and enter the container name that we used earlier (i.e. staticcontent). In this case, we don’t use a forward slash. It’s just the container name. Then, in the optional arguments, I typically add the following argument string:
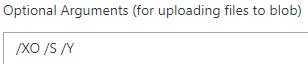
The first argument will only overwrite or copy files if the last date modified is later than the file that already exists on the server. The second argument copies subdirectories. The last suppresses any “are you sure?” type questions prompted by the command as the Azure File Copy task is essentially running AzCopy behind the scenes.
Note: Using the described approach above will not remove pre-existing files from the CDN. There are arguments you can pass into AzCopy to purge files, but I typically discourage that without first verifying that those files are no longer needed.
Summary
During this walk through, we deployed content from a repository to an Azure Storage account.